In early 2026, a blind study found that online shoppers could no longer reliably tell AI-generated product images apart from studio photography. The studio-replacement era isn't coming — it's already here. Yet most sellers are still uploading a single blurry phone photo and wondering why their click-through rate is flat.
This guide gives you the full picture: which images you actually need for each platform, which AI tools do the job fastest, and how to set up a repeatable workflow that turns one raw photo into a complete listing gallery in under 30 minutes per SKU — without Photoshop skills.
"77% of consumers say they always rely on product images before making a purchase decision. High-quality images can boost conversions by up to 30%."
— Salsify Consumer Research Report, 2025 / Onramp Funds Data
First: Know the 7-Image Stack You Actually Need
Before generating anything, understand the 7-image listing stack that high-converting product pages use. Each slot has a specific job — and a specific platform rule.
Slot 1 · Required
Hero / Main
Pure white bg (RGB 255,255,255). Product fills ≥85% frame. No text, no props.
Slot 2
Lifestyle Scene
Product in a real-world setting. Answers: "where would I use this?"
Slot 3
Infographic
3–5 key features with icons and short labels. Mobile-legible text only.
Slot 4
Detail / Close-up
Texture, material, craftsmanship. Answers "what is this actually made of?"
Slot 5
Scale / Context
Show size next to a hand or familiar object. Prevents "not as pictured" returns.
Slot 6
On-Model
For apparel, accessories, beauty. AI virtual try-on now replaces the model shoot.
Slot 7
Comparison / USP
Side-by-side or before/after. Makes your differentiator unmissable.
Platform rules at a glance:
Amazon: hero must be white bg; all 7 slots allowed
Shopify: full creative freedom
TikTok Shop: lifestyle + short video clips
Walmart: white bg hero, 2000×2000px minimum
Etsy: authenticity over polish; 10 slots, use them all
Left: clean hero shot on white. Right: lifestyle context — both generated from the same source image using AI scene tools.
The 3-Phase Workflow: From One Photo to Full Gallery
The fastest modern workflow has three phases — Capture, Process, Generate. You shoot once. AI multiplies your output.
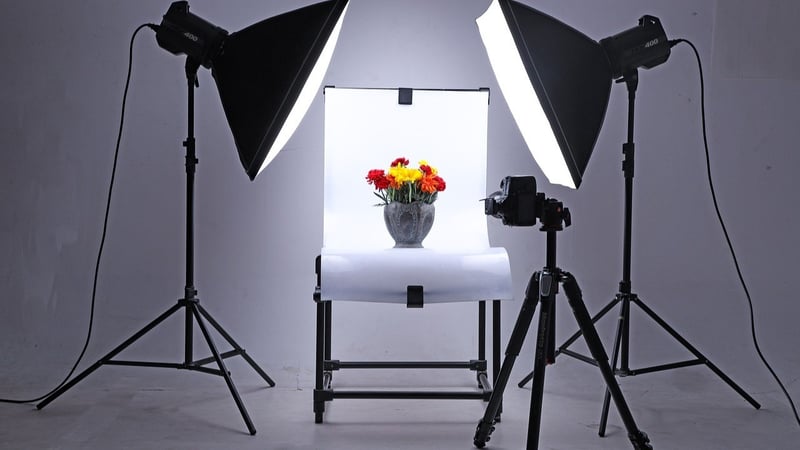
Phase 1: A well-lit smartphone shot against a neutral (not white) background is your perfect starting point.
Phase 1 — Capture (5 minutes)
1
Shoot against neutral, not white
Counterintuitively, shoot against light gray or beige — not white. White merges with product edges and makes AI background removal harder. A neutral background gives the AI clean separation. Post-2022 smartphones are fully sufficient. A $25–35 ring light is your only required equipment.
2
Capture 3–4 angles minimum
Front, side, top (flat lay), and one 45° angle. These become source files for everything — close-ups are cropped from these, scenes are composited onto these. More angles = more output variety without extra shooting sessions.
3
Keep lighting consistent across shots
Inconsistent lighting is the #1 reason AI output looks "off" — the tool can't match shadows across images. One ring light from a fixed position solves this completely. Shoot the entire SKU in one session without moving the light.
Phase 2 — Process (10 minutes)
4
Remove background, create your master cutout
Upload to Photoroom, Claid, or Remove.bg. Export as PNG with transparent background. This clean cutout is your master asset — every image type gets built from it. Name it with your SKU: PRD-0042-cutout.png. Save it permanently.
5
Generate your white-background hero
Place the cutout on a pure white canvas (RGB 255, 255, 255). Resize so the product fills ≥85% of frame. Export at 2000×2000px minimum as JPEG. This is your Amazon main image and marketplace compliance baseline. Claid AI handles this automatically.
6
Enhance: upscale, sharpen, correct color
Run through Claid or Photoroom's enhancement tools. Upscale to 4K where possible — Amazon's zoom feature punishes low-res. Fix any color shift from lighting. Batch tools do this in under 2 minutes per image.
Phase 3 — Generate (15 minutes)
7
Generate lifestyle scenes from your cutout
Use Flair.ai or Claid's scene generator. Describe the setting with a text prompt or pick a template: "modern kitchen countertop, morning light" or "minimalist living room shelf, soft evening." Good tools handle perspective matching and shadow casting automatically — the product sits naturally in the scene.
8
Build your infographic overlay
Use your lifestyle image as the background. Add 3–5 feature callouts with short text and icons in Canva. Keep all text legible at mobile thumbnail size — 24px+ minimum. Tools like PicWish and Ecomtent now auto-generate infographic overlays directly from your product description.
9
For apparel: run AI virtual try-on
Tools like SellerPic and Pic Copilot generate on-model shots from a flat garment photo. Select model body type, ethnicity, pose, and background. One fashion seller reported a 50% CTR increase and 40% conversion lift after switching from flat-lay to AI model images — with zero photoshoot cost.


Flat lay source (left) → AI-generated lifestyle scene (right). Same product, 2 minutes apart.
Don't subscribe to five separate tools to do the job of one. Here's how to pick based on what you actually need:
Tool stacking guide by catalog size
- Small catalog (<50 SKUs) — Photoroom handles 80% of your needs solo. Start here.
- Mid-size (50–500 SKUs) — Photoroom for quick edits + Flair.ai for creative lifestyle scenes
- Large catalog (500+ SKUs) — Claid.ai with API batch processing. The investment pays back fast.
- Fashion sellers (any size) — SellerPic or Pic Copilot replace the model photoshoot entirely
- Amazon A+ Content — Ecomtent auto-generates infographic modules from your product copy
Watch: Tool Tutorials from Real Sellers
These YouTube tutorials walk through the tools mentioned above with real product examples. Each is under 15 minutes and shows actual before/after results.
Photoroom · Backgrounds
How to Create AI Backgrounds for Product Photos — Best Ecommerce Hack
2025 · Ecommerce photography
Flair.ai · Lifestyle Scenes
Flair AI Tutorial — Create Stunning Product Images in Minutes
2025 · Scene generation workflow
ChatGPT Image · Dropshipping
How I Use AI to Create Photo-Real Product Images (ChatGPT Image Generator)
2025 · Dropshipping + AI workflow
Photoroom · Full Walkthrough
This AI App is Changing Product Photography Forever — Full Walkthrough
2024 · Full Photoroom tutorial for sellers
Best Practices That Separate Good Listings from Great Ones

Review your full 7-image stack before publishing. One weak slot can tank an otherwise great listing.
Think mobile-first, always
Over 70% of marketplace traffic is mobile. Your infographic text, feature callouts, and lifestyle compositions need to be legible and compelling at 150px thumbnail size. If it doesn't read on a 4-inch screen, it won't convert. Test every image at thumbnail scale before publishing.
Never skip the scale image
"Not as pictured" returns are expensive and damage your seller rating. A single image showing your product next to a familiar object eliminates the #1 source of customer disappointment. AI tools like Flair.ai can composite a hand into your scene automatically — there's no excuse to skip this slot.
Use AI for 70–80%, real photography for the other 20–30%
For hero images on luxury products or categories where texture and materiality drive purchase decisions (leather goods, jewelry, fine fabrics), real photography still wins at the margin. The smart approach: use a professional shoot for your hero shot, then use AI to generate every seasonal variant, secondary angle, and social crop from that one high-quality base image.
Name files with SKU and slot
Use a consistent naming convention from day one: SKU-slot-version — for example PRD-0042-01-hero.jpg or PRD-0042-07-lifestyle-kitchen.jpg. When you have 300 SKUs and need to update one background, you'll be able to find the right file instantly instead of hunting through folders.
Batch-test 10 images before processing your full catalog
Different product types behave differently with AI background removal — transparent materials, fine-edge products, shiny surfaces, and products with complex shapes all have unique failure modes. Run a test batch of 10 diverse products before committing your entire catalog. Catch quality issues early, adjust settings once, then scale confidently.
Build a scene library and refresh seasonally
One of the biggest workflow advantages of AI-generated lifestyle images: you can swap the scene for a seasonal refresh without a reshoot. Spring greenery → summer outdoor → cozy fall interior — same product cutout, same master file, new scenes in minutes. Pro tip: build a library of 5–10 approved scene prompts per category. Consistency beats novelty in catalogs, and Amazon rewards fresh listing activity.
A/B test your image stack
Most sellers set their images and forget them. The sellers who win long-term treat their image stack as a living experiment. Test: Does lifestyle or white-bg hero perform better as slot 2? Does a model shot outperform a flat lay for your category? Small wins in CTR from image tests compound into meaningful revenue differences over time.
The bottom line
The old workflow — hire a photographer, wait a week, pay $500 per SKU, repeat for every seasonal update — is genuinely obsolete for most catalog work. With a $25 ring light, a modern smartphone, and one well-chosen AI tool, you can produce a full 7-image listing gallery that meets every platform requirement and outperforms what most competitors are uploading today.
The highest-converting sellers in 2026 aren't the ones with the biggest photo budgets. They're the ones who ship fastest, test the most image variations, and refresh their listings while competitors are still waiting for a studio callback.
Need Better Listing Images Fast?
Run your first AI-powered image workflow today and benchmark your catalog against top-performing competitors in minutes.